Showing posts with label Beaded bead. Show all posts

Saturday, 24 May 2014

Why Not Make a Beaded Button?

We all know about beaded beads, ideally a self-supporting, rigid, regular structure made up only of smaller beads. Well how about beaded buttons? A quick trawl of the net turns up mostly buttons made up from a covered button base, with seed beads over the top. I think that it is time to make more self-supporting, rigid, regular and robust beaded buttons!

When I make a piece of jewellery, it is an essential design element to finish it off with a clasp that is in keeping with the actual work. I quite often make a button and loop. Though I could use a toggle and loop, it's just personal taste. Of course a loop and button of the same beads as the work is best.

A button shape is preferable to a round shape because a loop needs a really close fit to keep from slipping off a round bead, but it will catch easily behind a flat button shape.


Pellet beads + Chaton, Tila Beads, and Seed beads + Chaton, beaded buttons

These beaded buttons could also be used on actual clothes, for example a skating dress that already had lots of gems and embroidery, (that was destined only for the dry cleaners).

Another beaded button that I have made is on the Buttercup Bracelet. Each buttercup is effectively a button, so the bracelet can be fastened to any length, by choosing which button to put the loop over.
Buttercup Bracelet

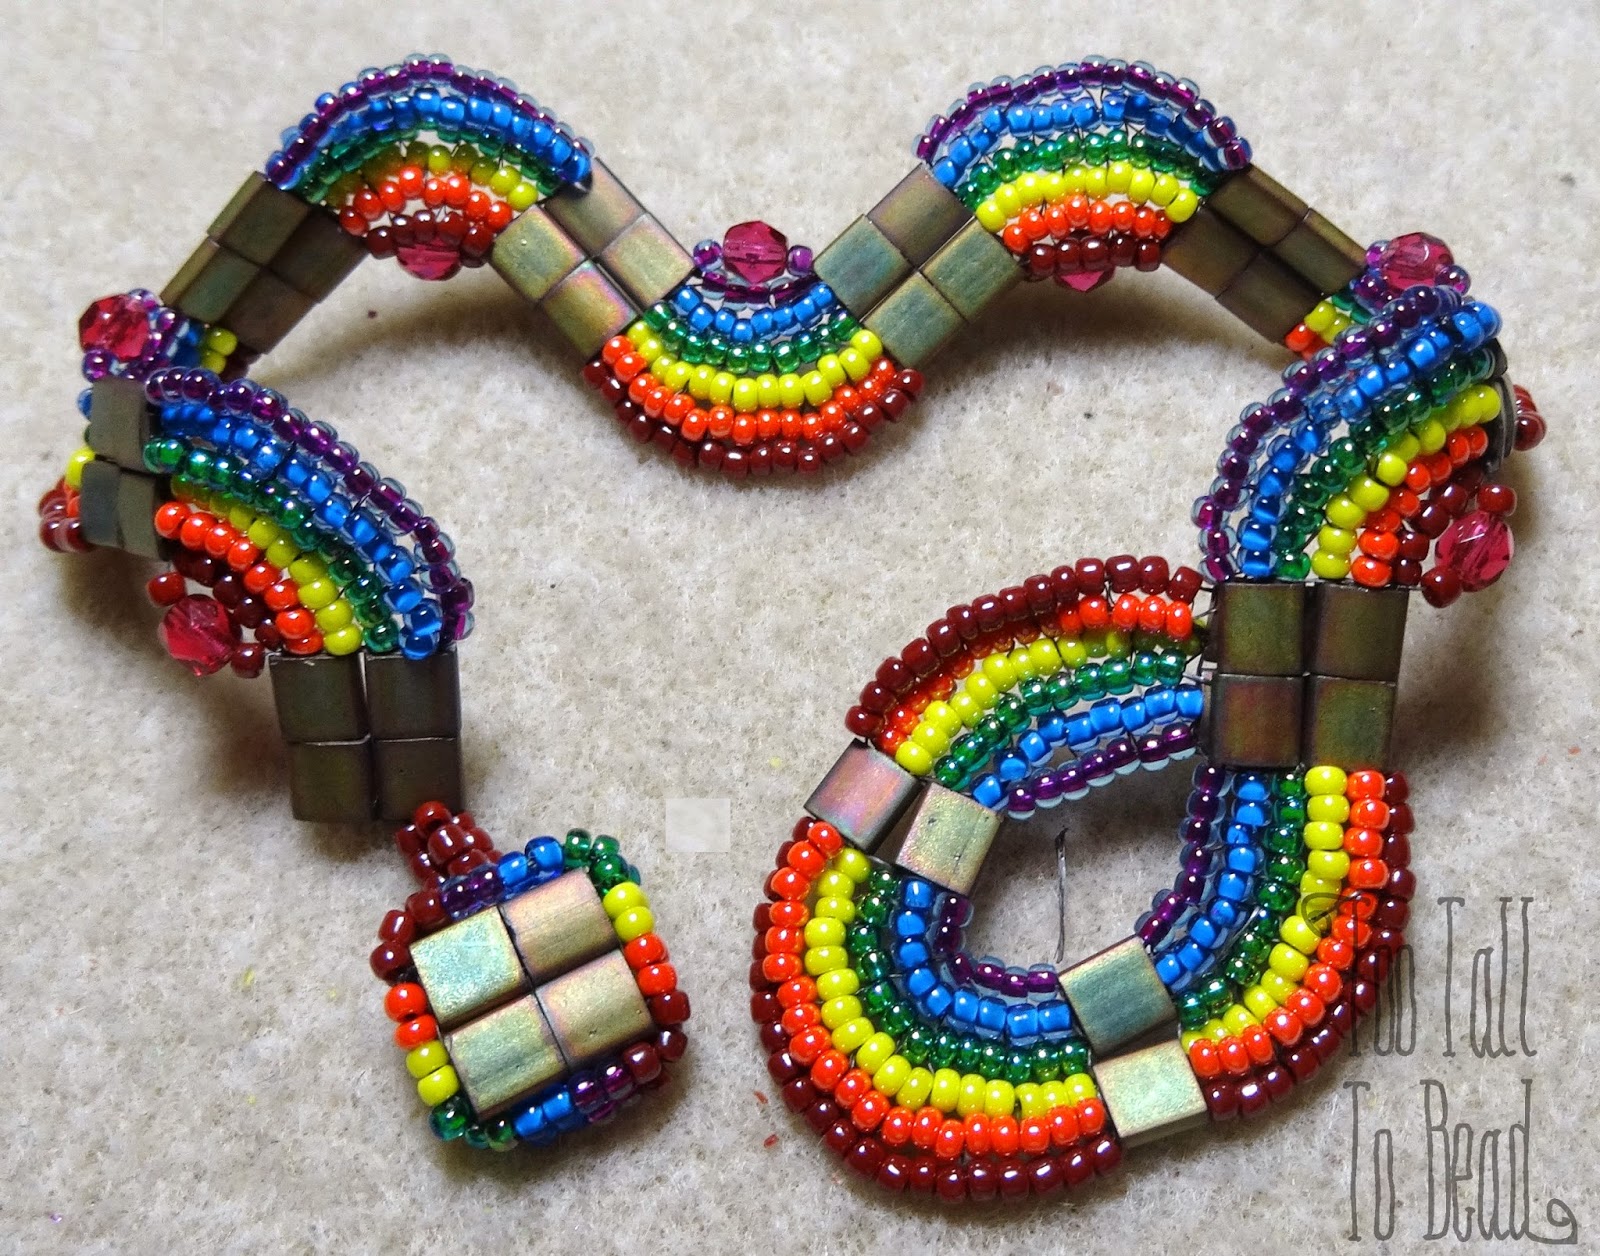
And finally a four-square beaded bead on my Rainbow Helix Bracelet

Rainbow Helix Bracelet

So there's definitely plenty of scope for making beaded buttons. It helps to start with a flat shape of bead, such as a tila bead. Keep it simple, the finished bead must be robust enough to stand some manipulation when pushed through a loop, and that loop does not need to be too tight.

Right, I'm off to make some pyramid beaded buttons! 
Keep a look out for other beaded buttons that might be out there, I would love to know where they are?

This blog has now moved to :TooTallToBead.co.uk

Thursday, 27 February 2014

The Lost Stitch? Square Stitch!

I have just completed my latest project currently called, for want of a better name The Wiggly Bracelet. I came to make it because I needed a break from duo beads, I've been playing with them too much!
Thinking about ways of using czech, two holed, tile beads, I decided to make a ric-rac inspired bracelet, with what I thought might be called a variation on herringbone weave, but with uneven bead counts, originally with four strands, but it turned out that three strands worked best. 
Any way I made this:-
Wiggly Bracelet with beaded bead clasp.

However, its been bugging me all week what this herringbone-like stitch might be called?

Well, the penny dropped yesterday, and I remembered that it is called square stitch. 
Now, I'm not sure that I have seed anything made in this stitch for a really long time, it is really useful for surrounding focal beads, and it goes around corners!

So lets all have a go designing something in square stitch, bring it back!!!


What followed is a Double Wiggly Bracelet, also with beaded bead. 


Here' s a close up of my beaded bead. I'm calling it the Impossible To Teach beaded bead. It's really pretty, and tactile, but you have to do so many thread passes to make it stable, that I'm sure nobody but me could be bothered!

Let me know what you think about square stitch!
Bonne Perler!

Friday, 24 January 2014

Windows and Arches goes Three Dimentional

If you have been following me on Facebook, then you will know about my design 'Windows and Arches' which is a modular design where you first make the windows, then join them with the arches. This allows for many design variations.


The Original Bracelet

The Necklace Variation with added Rivoli Bezel

Last weekend it struck me that this can, of course, be applied to beaded beads. The main adaptation is that now the windows are triangular and pentagonal, as well as square. I substituted seed beads for the bicones that were in the original windows, and here is the result:
Left to Right: Tetrahedron, Octahedron, Cube, Dodecahedron and Icosahedron.

I couldn't help making each one slightly different. The cube has 4mm bicones in each corner, the Dodecahedron has a 12mm round rock crystal inside it, and the Octahedron has 8mm chatons framed inside four of the faces. This was by far the most difficult bit!
Placing an 8mm chaton inside the octahedron faces, very fiddly to do the last one!

Having done this exercise I found that for a square or triangle window, 11/0 seed beads are the best size, but for the pentagonal window 8/0 seed beads are best and very satisfactory!
Inspired be this I made another icosahedron, with four colours of window. To make sure that no two adjacent windows are the same colour, I had to print off an icosahedral net, and then colour in the points until I had solved this puzzle.

Finished Four Colour Icosahedron

And finally, when I had completed this one, I fancied doing a more lacy version, so I added a hexagon of 6 seed beads in each corner. This gives the effect of separating the faces more clearly, and making the hollow centre more obvious. Very pleasing :-)
Completed Lacy Icosahedron

Beaded beads necklace

The beaded beads make a lovely necklace, I squished the tetrahedron inside of the cube. Nice.


Tuesday, 5 November 2013

Ripples and Splash, Competition Entry for the Nottingham Bead Show

Now that I have ramped up my bead-weaving exploits by starting to teach a new class, I thought that I should enter a competition to see how my designs rate against other designers!


I have recently discovered Preciosa 'Pellet' beads (from www.robins-beads.co.uk), which I have found make a great way to capture a rivoli:

Rivoli captured using Preciosa 'Pellet' beads. A nice simple pendant.

Also I designed a 'Wave' bracelet:
Which of course included a beaded bead! 

Now, my idea was to use the wave design, but also make it into a double helix, by having a secondary strand, using peanut beads, mirroring the first. Also to incorporate two captured rivoli's and several beaded beads.

The shape of the pellet beads is a cylinder with a narrow waist, which I immediately wanted to wrap beads around, (I do like to make an outline around things!), but it also is a good groove to hold onto the edge of the rivoli. The peanut beads share the same quality, and come in two sizes, so they go well with the pellet beads in a design.

In order to keep my options open, I left any spare thread on each element as I made it, so that it would be easy to join the sections later.

First section of the ripple, with two rivoli sections.

Since I had a very clear idea of what I wanted, I had the first wave section, and two rivoli's very quickly. Next I needed matching 'chain' to go round the back of the neck. 
After some experimentation, I came up with something, and then realized that it is a version of 'Horace's Lakota Chain', which starts using the pellet beads, then gradually blends to the peanut beads in the 'eyes' of the chain. You can just see thin on the finished picture.

Next the 'Splash' element was expanded to be bigger, and more splashy. 

I couldn't decide on the beaded bead, so I incorporated a loop on the back of the splash to clip the beaded bead onto, and made three beaded beads. 
Each beaded bead has a lobster claw clasp, (Which I think are attractive enough to be seen). This is something that I often do with beaded beads so that they can be worn separately. You can wear the necklace with any or none of the beaded beads, and they can be stored on the end of the extension chain at the back!

The largest beaded bead I made is woven over a 12 mm rock crystal round bead. A cheat, I know, but I was trying to create a beaded bead that is easy to teach! Having something to model the bead-work over is a great help in this case. The other two beaded beads are an octahedron, and tetrahedron, though not exactly the same design, as I needed to add extra beads in places, to make space for the backs of the pellet beads which extend into the centre.

Tetrahedron and Octahedron beaded beads.

Finally a nice presentation box and it's ready to go!


All finished! Wish me luck!

I'll let you know how it gets on sometime after November 24th!

Check out the 'Wave' Bracelet tutorial on my Etsy shop