Saturday 24 May 2014

Why Not Make a Beaded Button?

We all know about beaded beads, ideally a self-supporting, rigid, regular structure made up only of smaller beads. Well how about beaded buttons? A quick trawl of the net turns up mostly buttons made up from a covered button base, with seed beads over the top. I think that it is time to make more self-supporting, rigid, regular and robust beaded buttons!

When I make a piece of jewellery, it is an essential design element to finish it off with a clasp that is in keeping with the actual work. I quite often make a button and loop. Though I could use a toggle and loop, it's just personal taste. Of course a loop and button of the same beads as the work is best.

A button shape is preferable to a round shape because a loop needs a really close fit to keep from slipping off a round bead, but it will catch easily behind a flat button shape.


Pellet beads + Chaton, Tila Beads, and Seed beads + Chaton, beaded buttons

These beaded buttons could also be used on actual clothes, for example a skating dress that already had lots of gems and embroidery, (that was destined only for the dry cleaners).

Another beaded button that I have made is on the Buttercup Bracelet. Each buttercup is effectively a button, so the bracelet can be fastened to any length, by choosing which button to put the loop over.
Buttercup Bracelet

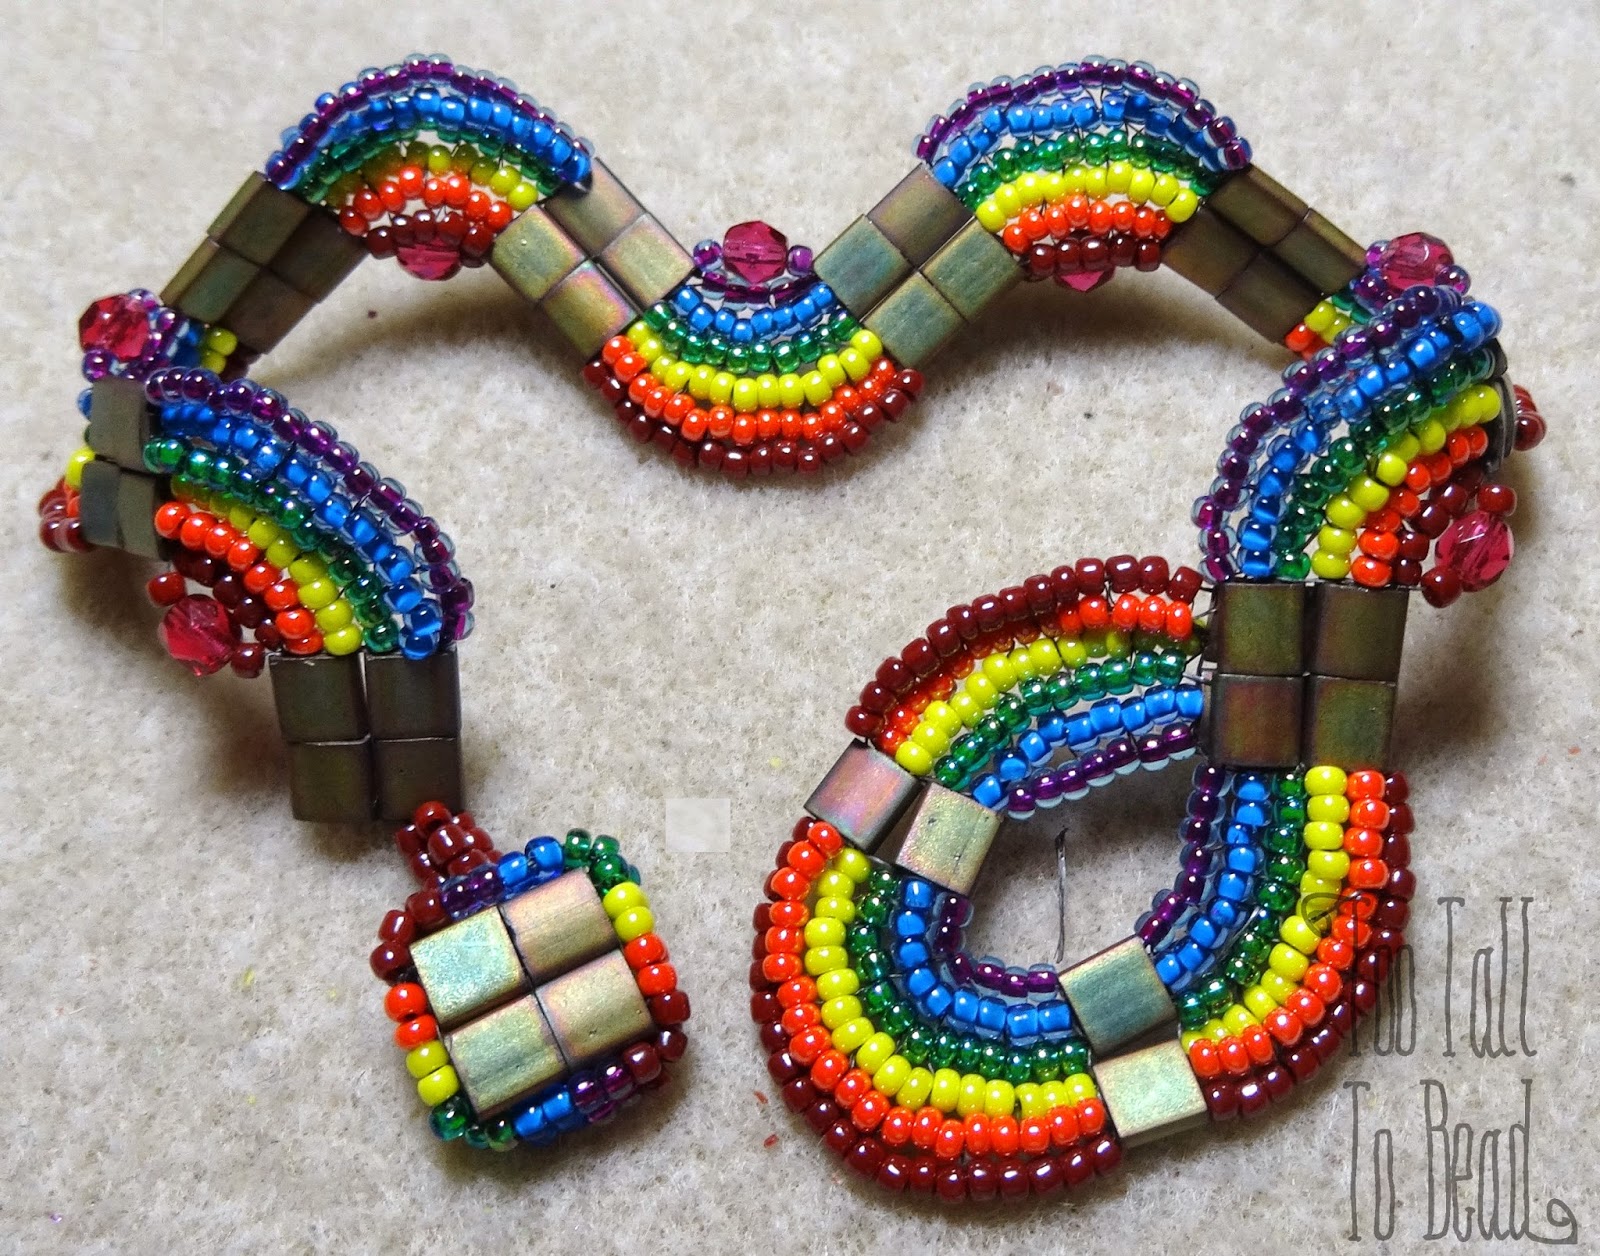
And finally a four-square beaded bead on my Rainbow Helix Bracelet

Rainbow Helix Bracelet

So there's definitely plenty of scope for making beaded buttons. It helps to start with a flat shape of bead, such as a tila bead. Keep it simple, the finished bead must be robust enough to stand some manipulation when pushed through a loop, and that loop does not need to be too tight.

Right, I'm off to make some pyramid beaded buttons! 
Keep a look out for other beaded buttons that might be out there, I would love to know where they are?

This blog has now moved to :TooTallToBead.co.uk

Saturday 17 May 2014

Herringbone Weave with Superduo Beads

Pattern now available on my etsy store! Here


Ever since I first came across superduo beads, I felt sure that they could be woven such that they made a herringbone pattern, just like brick pavements.
Looking on the net the closest that I could find was this, by the Potomac Bead Co (http://www.youtube.com/watch?v=XzkgPVH5cyo) but this also incorporated seed beads, so it was not what I was looking for, though it is a lovely design.

I found a gold bracelet that was exactly what I was looking for, but made of actual gold!


So with this inspiration in mind, I set about many failed attempts, and lots of wasted thread, before I cracked it.


First Successful Herringbone Weave.

It comes out a bit like knitting, in that you do a cast on row, several "knit" rows, and then a cast off row.
The next thing was to make it more interesting, by making it stripy and tying a knot in it...


...or by adding a picot edge. (Also covers the side threads)

..or by capturing a rivoli

So lots of variations then, though the rivoli capture is a bit fiddly, and reminds me of a shortbread biscuit!

What I need to know is if anyone else has come up with the same thing? It seems an obvious thing to do with a superduo bead to me, so I'm sure that someone else would have found this too.

So, if you have found this elsewhere please let me know! I would love know if it was unique!!

Bonne Perler

Please note this blog has now moved to my website: TooTallToBead.co.uk


Thursday 27 February 2014

The Lost Stitch? Square Stitch!

I have just completed my latest project currently called, for want of a better name The Wiggly Bracelet. I came to make it because I needed a break from duo beads, I've been playing with them too much!
Thinking about ways of using czech, two holed, tile beads, I decided to make a ric-rac inspired bracelet, with what I thought might be called a variation on herringbone weave, but with uneven bead counts, originally with four strands, but it turned out that three strands worked best. 
Any way I made this:-
Wiggly Bracelet with beaded bead clasp.

However, its been bugging me all week what this herringbone-like stitch might be called?

Well, the penny dropped yesterday, and I remembered that it is called square stitch. 
Now, I'm not sure that I have seed anything made in this stitch for a really long time, it is really useful for surrounding focal beads, and it goes around corners!

So lets all have a go designing something in square stitch, bring it back!!!


What followed is a Double Wiggly Bracelet, also with beaded bead. 


Here' s a close up of my beaded bead. I'm calling it the Impossible To Teach beaded bead. It's really pretty, and tactile, but you have to do so many thread passes to make it stable, that I'm sure nobody but me could be bothered!

Let me know what you think about square stitch!
Bonne Perler!

Sunday 23 February 2014

Using Paper Patterns in Beadwork Design

I'm sure that everyone has been doing this since forever, but I only just thought of it, so I will share!
When I am designing a necklace, I previously had trouble making it into a shape that will lie flat on the neck when it is being worn. This of course does not apply to strung pieces, as they will naturally fall into the most natural shape.
If the shape that you are trying to achieve is two, or even three dimensional there is little or no flexibility within the shape, so the piece has to be the correct shape or else it will twist or flip over as it goes around the curve of the neck, for example a triangular shaped necklace like my 'Windows ans Arches' necklace.

This week I have been making a version of my 'Princess's Daisies' design, in a different colour, and shape, so that it can be worn with a scoop necked top.


I made a simple paper pattern, and then placed the component parts on it. These daisies can either be joined with two petals or one, this is dependant on whether they have an even or odd number of petals. (I have made lots of different sizes.)
Where they join with two petals, the shape is set, where they join with one petal the shape is flexible. So there is still some flexibility in this particular design from the single petal joins.

I made the alternating larger daisies first. Then, starting at the front I made the smaller daisies, which I placed on the pattern so that I could see which petals to join to create the correct curve. I worked my way from the front to the back placing a small daisy in each gap.

I will definitely be using this approach in future when I make less flexible designs. 
I should have thought of this last week when I was making my Large Celtic Triangle necklace, but I can still use it for the re-design.


Finished necklace


Midnight Daisies Necklace


Designed for my favourite scoop necked top.

Friday 21 February 2014

Playing With Paisley


I currently have two patterns, Windows and Arches, and The Princess's Daisies that I have been exploring to find what other shapes and designs I can bend them into. 

I really like paisley shapes, they are naturalistic, and not symmetrical. Here are my first two paisleys, one in each pattern:

Paisleys made with my two patterns, windows and arches above, princess's daisies below.

To go with the top paisley I have made lots of different shapes that I am going to join together to make a lacy cuff, maybe it will come out a bit like irish crochet

To go with the bottom paisley I have brought a large swarovski triangle to be the centrepiece of a very glitzy necklace, and I would love to surround it with more paisleys, and riviol  bezels. 
It was pretty tricky to capture the triangle, I needed about three extra fingers to hold it in place! 

Centre piece, and beginning paisley for a glitzy necklace

Here's my sketch.
Huge Triangle necklace, initial sketches. 

I'll keep you posted with the latest developments!

Bonne Perler!

This blog has now moved to: TooTallToBead.co.uk

Sunday 16 February 2014

Windows and Arches, The Next Step?

Windows and Arches, The Next Step?

I have spent a couple of weeks teaching 'Windows and Arches' to my class. But I have been thinking about where to go with it next. I made a statement necklace that just uses the bracelet pattern up either side, then has a corner centre front and a dangle. The dangle gave me the opportunity to put a rivoli bezel inside a loop. 


Windows and Arches Necklace

Having added the bezel, I designed a bracelet with Arches and Bezels called 'I've Got My Eyes On You". I like the way that using dark purple beads on the bezels enhance the rich colours of the chatons. In fact I lost the first version of this, so I had to make a replica immediately as I was so pleased with the result. Someone out shopping had a lucky find!


I've Got My Eyes On You! Bracelet

The next step seems to be to explore celtic knot variations. 
Using a simple triangle knot (thanks Gerri for the idea), I made some variations, but I'm not sure that I am happy with any of them!
The question is whether to allow the strands to physically cross each other, which adds a dimensional element to the design, or to use a single window (little square filled with four bicones or 11/0 seed beads), to create a junction. Here are my variations:


           Little Fat Triangles        - Long Slim Triangles            - Over and Under Triangle

The little fat triangles are definitely no good because they don't lie flat. I quite like the Long slim triangles, but they would make a very wide bracelet, so maybe for a necklace. 
My current favourite is the over and under triangle. The problem with this one is that you need to use a stiff tension, and secretly join the overlaps to prevent it from being too unstable. (Instability is the curse of beadweavers!!!). All of the abovehave lost the lovely flow that the original design has. 
I also made a huge triangle knot necklace, using the four pane windows, and weaving the strands. With this I'm not yet happy with the way the strands wiggle as they cross over and under each other.  I will wear it to get some reactions, then maybe change the way that the strands weave.
Large Celtic Triangle Necklace

Maybe I'm just being fussy?
Or is it the scissors for this one?

Thursday 13 February 2014

Too Tall for Clothes, Alterations #1 and #2

Too Tall Alteration #1. Add Something Around the Bottom (of a Skirt or Dress!)

I recently purchased a black jersey dress in the sales. It is flattering and comfortable, and very cheap, but unfortunately made for someone much shorter than me! Though in my younger days I used to be able to get away with micro-mini skirts, I think I had better leave that to my teenage daughters these days!
For Christmas I received a knitting book called 'Knitting Over The Edge' by Nicky Epstein. This covers the many possibilities for cuffs, collars, button bands and edgings, but it does expect you to knit the rest of the jumper as well!
Not wanting to do that much knitting, my cunning plan was to lengthen the dress by knitting my own lace edging.
Obviously there are many ways of adding something to the bottom of skirts and dresses, but it needs to look like it was intended, rather than added after. Being black it was easy to match the colour. I chose merino four ply from Debbie Bliss. Using the pattern for "Angel Lace" from page 90, I knitted two shore pieces for the sleeves, and one long one for the hem.
 Finished Dress

Detail of lace around the hem
Lacy pieces, being blocked.

A pleasing result, though it required quite a lot of skill to get the lace sewn on without 'growing' the jersey of the dress too much. (large  zig-zags required!)
This is definitely a technique that I will return to in the future. I can't wait to knit some lace in an outrageous colour to compliment some future summery outfit.

Too Tall Alteration #2

You know when you buy some tights, but despite being the biggest size, they still do not reach all of the way up your legs? (or if you shrink your favourite pair?)
My best tip for this situation: Cut the toes off!
I have done this many times. The first time I zig-zagged the raw edge of the tights, but I soon realized that this is not necessary because the knit is too fine to ladder. on thick tights, I have not tried fine ones, as I don't tend to wear them.
I was even brave enough to snip off the toes of my favourite Falke tights,. They are fine, much more comfortable, and they have not laddered. Hooray!

Be brave, give them the chop!

Too Tall Alteration #2a The Big Chop! 

Another misguided sales acquisition of mine was a jersey velvet dress. In this case I just chopped below the bra-line, to make a skirt. I made a small casing around the top for elastic, all done! Though I'm not sure what I'm going to do with the remaining top part?
The middle section between the bra line and the waistline added extra much needed length to the skirt. Its great for skating!
Nice Skirt, Shame About the Top!

Happy chopping, and please send me any tall alterations queries if you have them!
I'm sure I would have encountered nearly all variations of these problems!